Table of Content
- Home automation using Arduino and Bluetooth
- Connection Diagram of Bluetooth Controlled Home Automation Project
- You are reading a preview.
- Share this document
- Home automation using Arduino and Bluetooth circuit diagram:-
- Components Required
- Similar to Bluetooth based home automation using Arduino UNO (
- Quiz 1 711 Question 1 1 1 point Name the five components of the healthcare
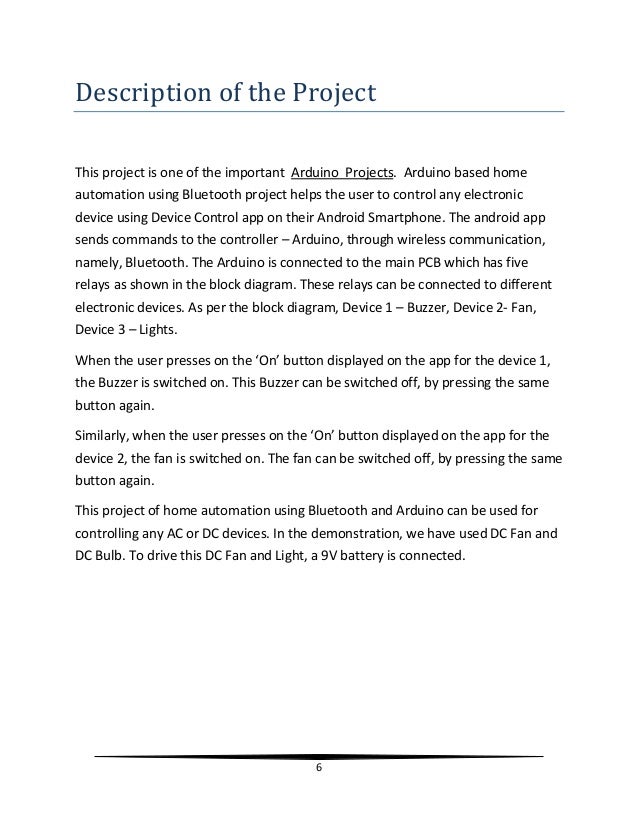
In the demonstration, we have used DC Fan and DC Bulb. To drive this DC Fan and Light, a 9V battery is connected. Moreover, set the value of the pins connected with the three bulbs to HIGH by using digitalWrite() function. Specify the pin as the first parameter and the value as the second parameter. This will ensure that all the bulbs are off initially. Next, we declare the Arduino pins that are connected with the LCD.
Servo motors are geared DC motors with the closed-loop circuitry incorporated within them. The basic configuration of a servo motor composed of a DC motor, gearbox, potentiometer and control circuit. Automation was a science fiction earlier but not today. By combining latest technology with home, we can build an awesome home. With the Arduino uno and Windows 10, we can build a home automation system that is capable of operating home devices automatically.
Home automation using Arduino and Bluetooth
Electroduino Tutorials help electronics lovers, makers, hobbyists, and engineers to learn and build electronics projects. We provide complete insight and technical details about electronic components and project tutorials and guides to implement projects. This blog is based on Home Automation using Arduino and Bluetooth HC-05 Module.
Throughout this guide, we will use an android smartphone that will connect to our Arduino development board. We will also use a Bluetooth terminal application to pair the two devices together. The connection of the HC-05 Bluetooth module with Arduino UNO is very easy as we will be using the serial communication interface that consists of two pins TX and RX. As you know, in order to communicate with the HC-05 Bluetooth module, we need to use a UART communication port of the Arduino board. After completing the installation process, open the app and make sure the circuit is connected to the power supply and the Bluetooth module is on. Also, make sure the Bluetooth module pair with your smartphone.
Connection Diagram of Bluetooth Controlled Home Automation Project
To define connections, we use the following line of code. This line creates a LiquidCrystal object and lcd is a name of the object that we are going to use to call LCD functions. The pin configuration of the PIR sensor is shown in the figure. PIR sensor consists of three pins, ground, signal, and power at the side or bottom. Generally, the PIR sensor power is up to 5V, but, the large size PIR modules operate a relay instead of direct output. This is a home automation project in which we can control electrical appliances using smartphones via Bluetooth.
Inside the infinite loop() we first check if serial data is available in the buffer. If data is found then the characters are added one by one to the array ‘inSerial’ using a while loop. Then we will call the Check_Protocol() function with ‘inSerial’ as an argument inside it. This function will be responsible for controlling the bulbs by comparing the received data and the command in the application. There are two types of pins on the whole 16×2 LCD module.
You are reading a preview.
IDE stands for Integrated Development Environment, entire programming for proposed system is done in Arduino IDE tool. Baud rate is set to 9600 bits per second for serial communication between Arduino board and smartphone. The working principle of ultrasonic sensor is demonstrated. Ping is input ultrasonic waves which are transmitted at the velocity of 340 mls and Echo is reflected output of sensor which is used to determine the distance. The ultrasonic sensor HC- SR04 parameter specification with their limitations.
These Lode Values are used in Arduino code to control a particular device by a particular app button. The Load values of the App buttons and their use is described in the below list. This is a 6 pin module, but in this project, we will use only 4 pins, these are VCC, GND, TX, and RX. The communication between the cell phone and the Arduino BT board is wireless.
Share this document
So the Device1 will also turn off, which is connected to the relay-1 of the relay module. At the same time, the “D1 is Off” status print on the 16×2 LCD Display Module. For example, when we Press the App “Button 1“, then the app sends Load value “1” to the Bluetooth module.
Also, we need to download and install the Bluetooth Controller App on our Smartphone, Which is sending data to the HC-05 Bluetooth Module. This gives an ease of controlling the device just by giving speech commands. In the app, there are many buttons that send some variable when we press those specific buttons. Then the Arduino starts to compare the received data with the Database and generates the output signals accordingly.
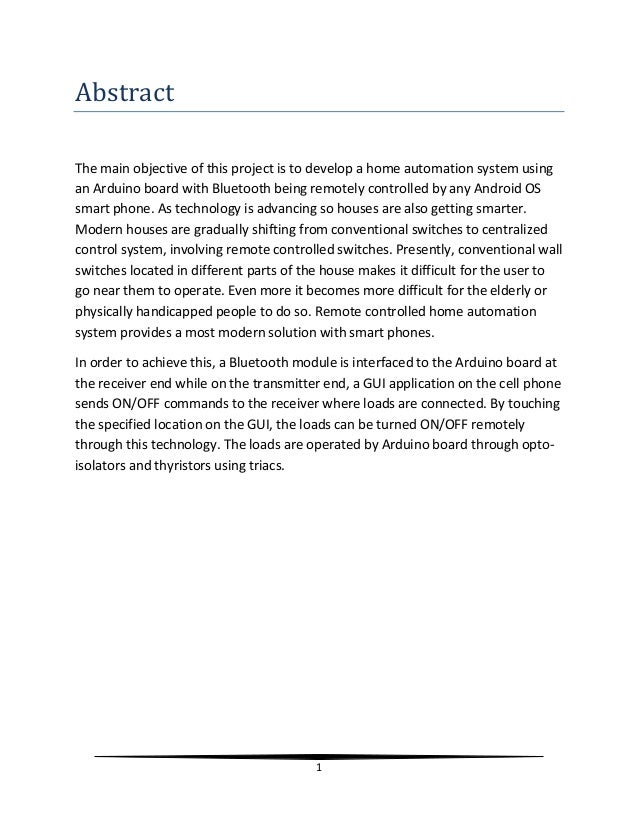
The main objective of this project is to develop a home automation system using an Arduino board with Bluetooth being remotely controlled by an Android OS smartphone. As technology is advancing so houses are also getting smarter. Modern houses are gradually shifting from conventional switches to the centralized control system, involving remote controlled switches. Presently, conventional wall switches located in different parts of the house makes it difficult for the user to go near them to operate. Even more, it becomes more difficult for the elderly or physically handicapped people to do so. Remote controlled home automation system provides a most modern solution with smartphones.

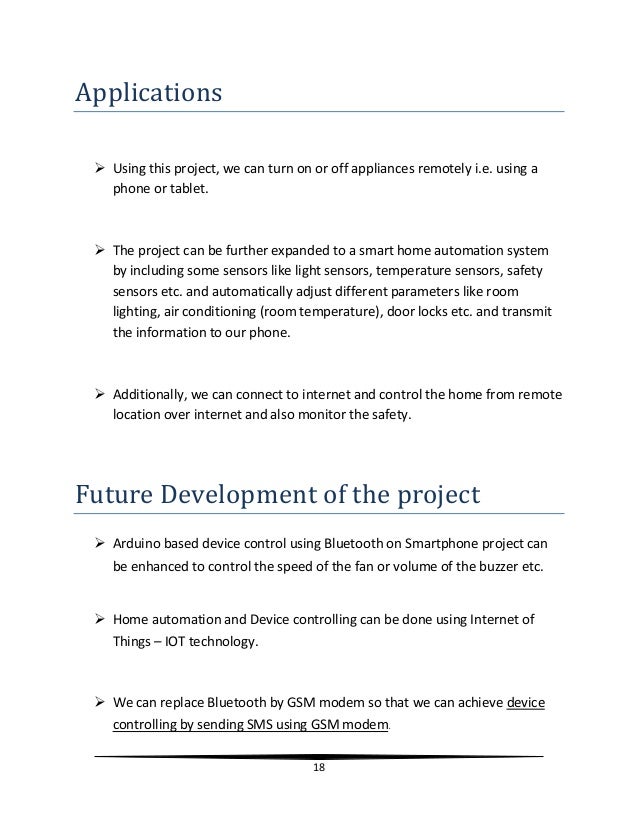
You can pair your phone with the HC-05 Bluetooth Module like we normally pair the phone with Bluetooth earphones or speakers. If your smartphone pair with the HC-05 Bluetooth module, then you can see the “HC-05 Bluetooth” name on the top side of the App and select it. This Arduino UNO consisting of a microcontroller namely ATMEGA328. It has both analog and digital I/O pins inorder to communicate with the external peripherals. Arduino based device control using Bluetooth on Smartphone project can be enhanced to control the speed of the fan or volume of the buzzer etc.
Also, we create an array of 15 characters called inSerial that we will use later on in the code to monitor the states of the bulbs. The diagram shows the pin configuration of a 16×2 LCD display. We have a dedicated tutorial regarding interfacing 16×2 LCD display with Arduino with some example sketches. Have a look at it before proceeding further for a better understanding of the LCD.
Some pins are used to send to 16×2 LCD and some are command pins. In other words, every pin has a role in controlling a single pixel on the display.16 x 2 LCD has sixteen columns and two rows. That means, it can display sixteen characters per row and it has two such rows. DC motor is used to move a gearbox with a large reduction ratio. The final shaft imposes a force on the external load and simultaneously acts on the axis of the feedback potentiometer. So, the potentiometer senses the position of the axis and sends a corresponding voltage to an operational amplifier.
This Buzzer can be switched off, by pressing the same button again. After connected Bluetooth, your app screen will be like the above image now you can control the system, with the on and off button. Hey Guys, Welcome back to the Techatronic, we are Shahid and Adnan Electronics engineers making this awesome project for you. If you are looking for Home automation using Arduino and Bluetooth.

It is pretty simple You should have only the basic knowledge about electronics and microcontrollers. To make this Home automation using Arduino and Bluetooth Now you can make this project by the given step at our website. Open the application and connect to the Bluetooth module. Bluetooth module receives them and the Arduino performs the operation, displays the status on the LCD, and sends a message back to the mobile.


No comments:
Post a Comment